
Mornings around here are not quiet affairs. For several months Wren was waking up between 4:30am and 5am. Every. Single. Day. As of about three weeks ago he’s finally adjusted to a 6-6:30am wake up—I never thought I would consider 6:30am “sleeping in.” When he wakes up I bring him into bed to nurse and try to drift off for just a few minutes more. Instead, he treats me to some thrashing, maybe a head butt to the face, and a lot of screaming or chatting to Daddy. Joyous. Phoebe often sleeps in a bit later, but once she’s awake she is ready to read, play, jump on Jonji and I, or chase Wren around until he inevitably trips over some odd object one of them threw on the ground earlier. It’s nonstop.
Recently Jonji stayed with Phoebe overnight at the New Brighton campground for a birthday party. I took Wren home to sleep and was, of course, woken up at the same ungodly hour as usual, but apart from that had a relatively mellow morning. I got to play some classical music for the two of us, which was a nice change from requests for “I Like to Move It, Move It” to be blasted at 7 o’clock in the morning.
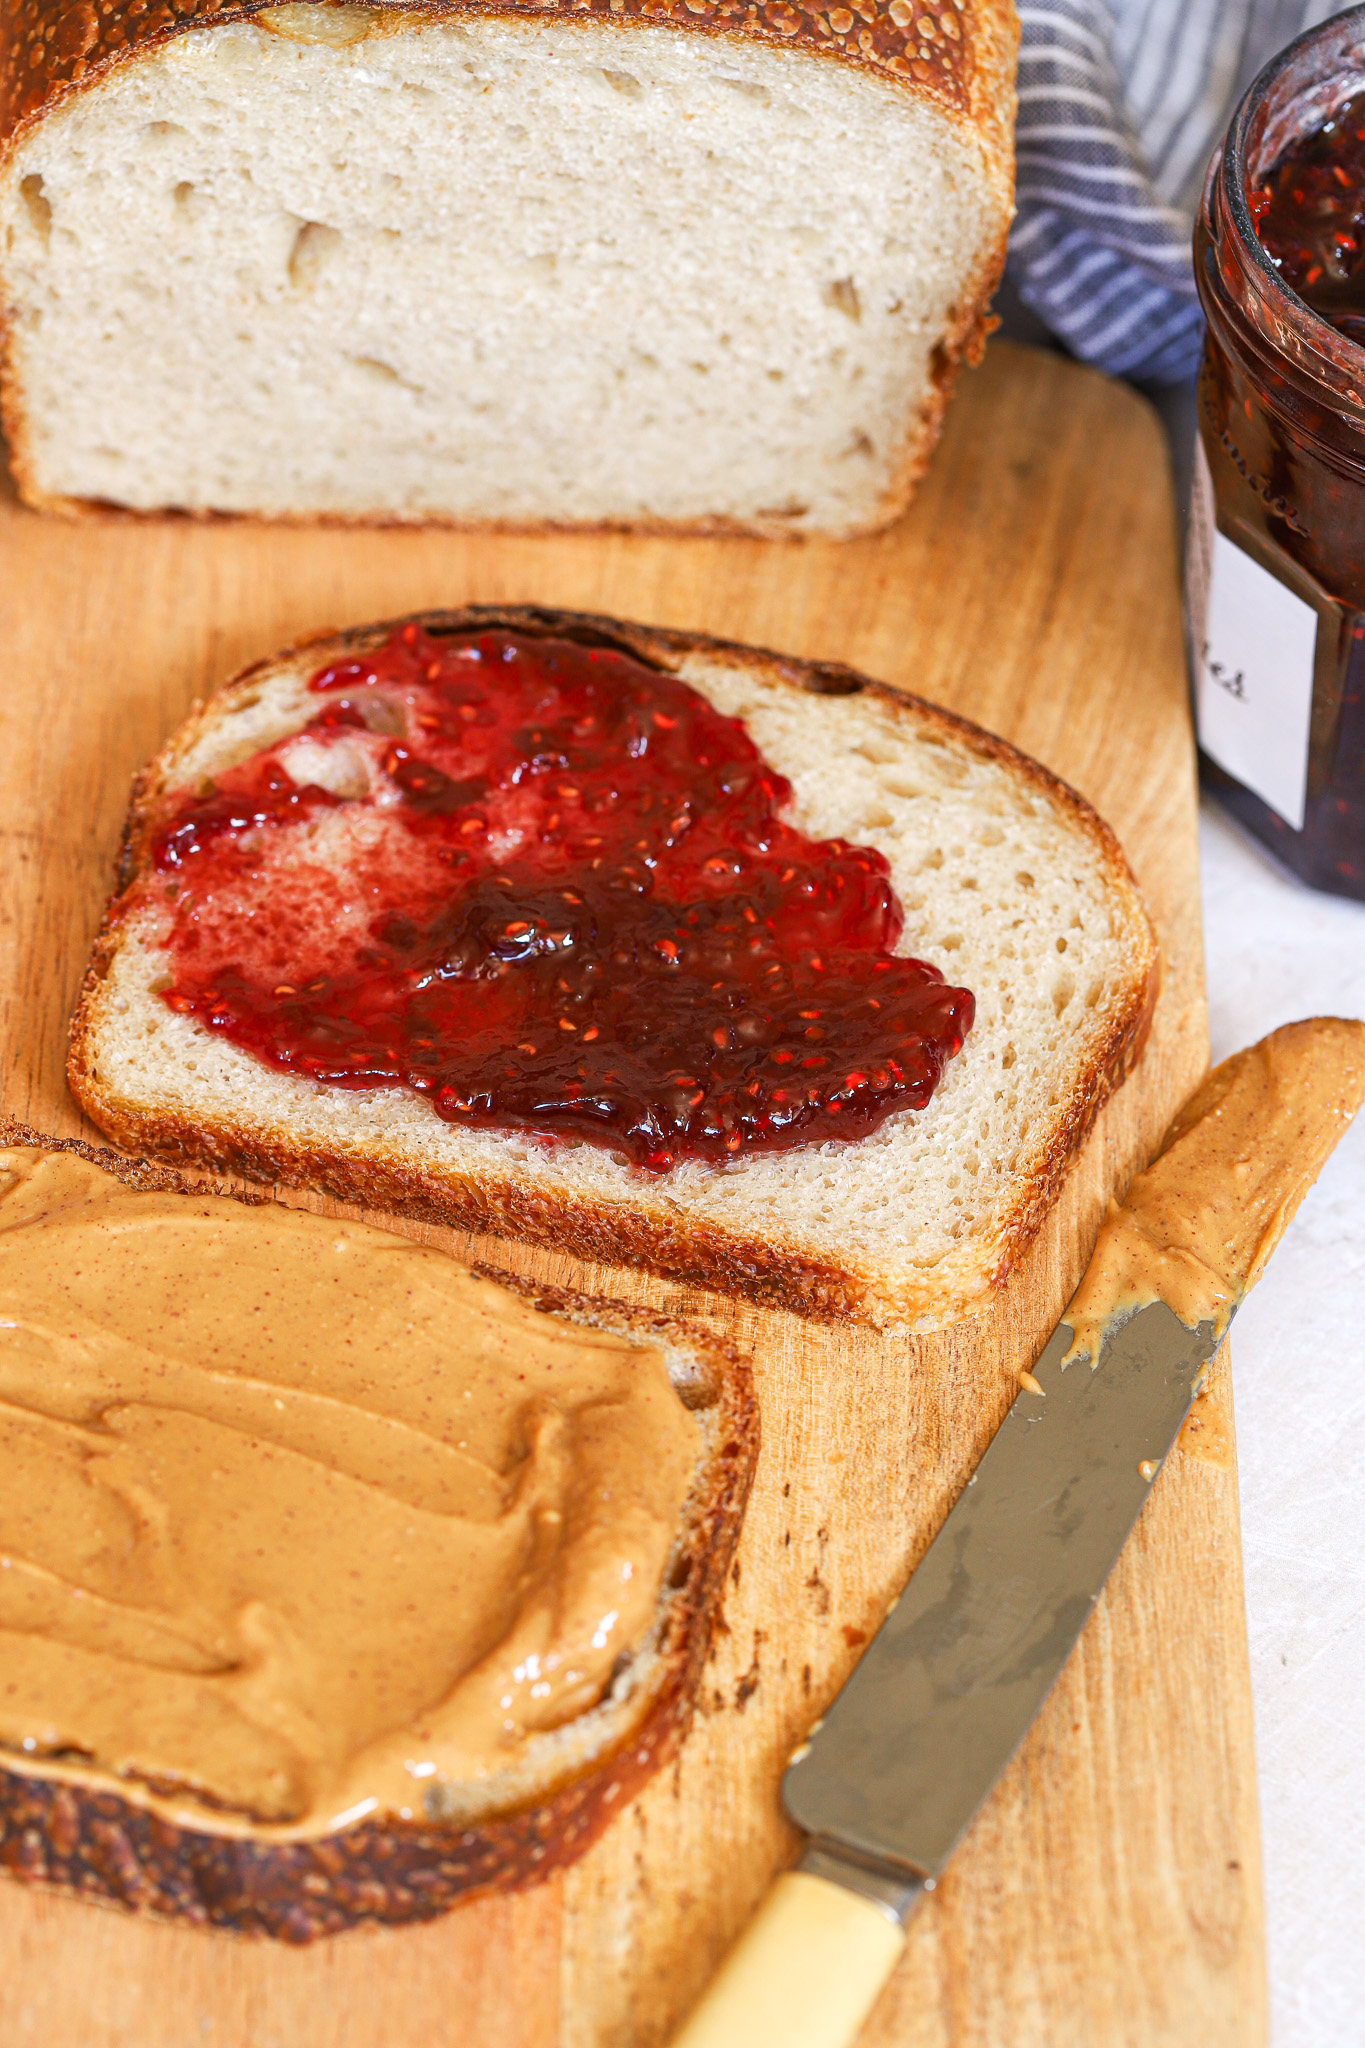
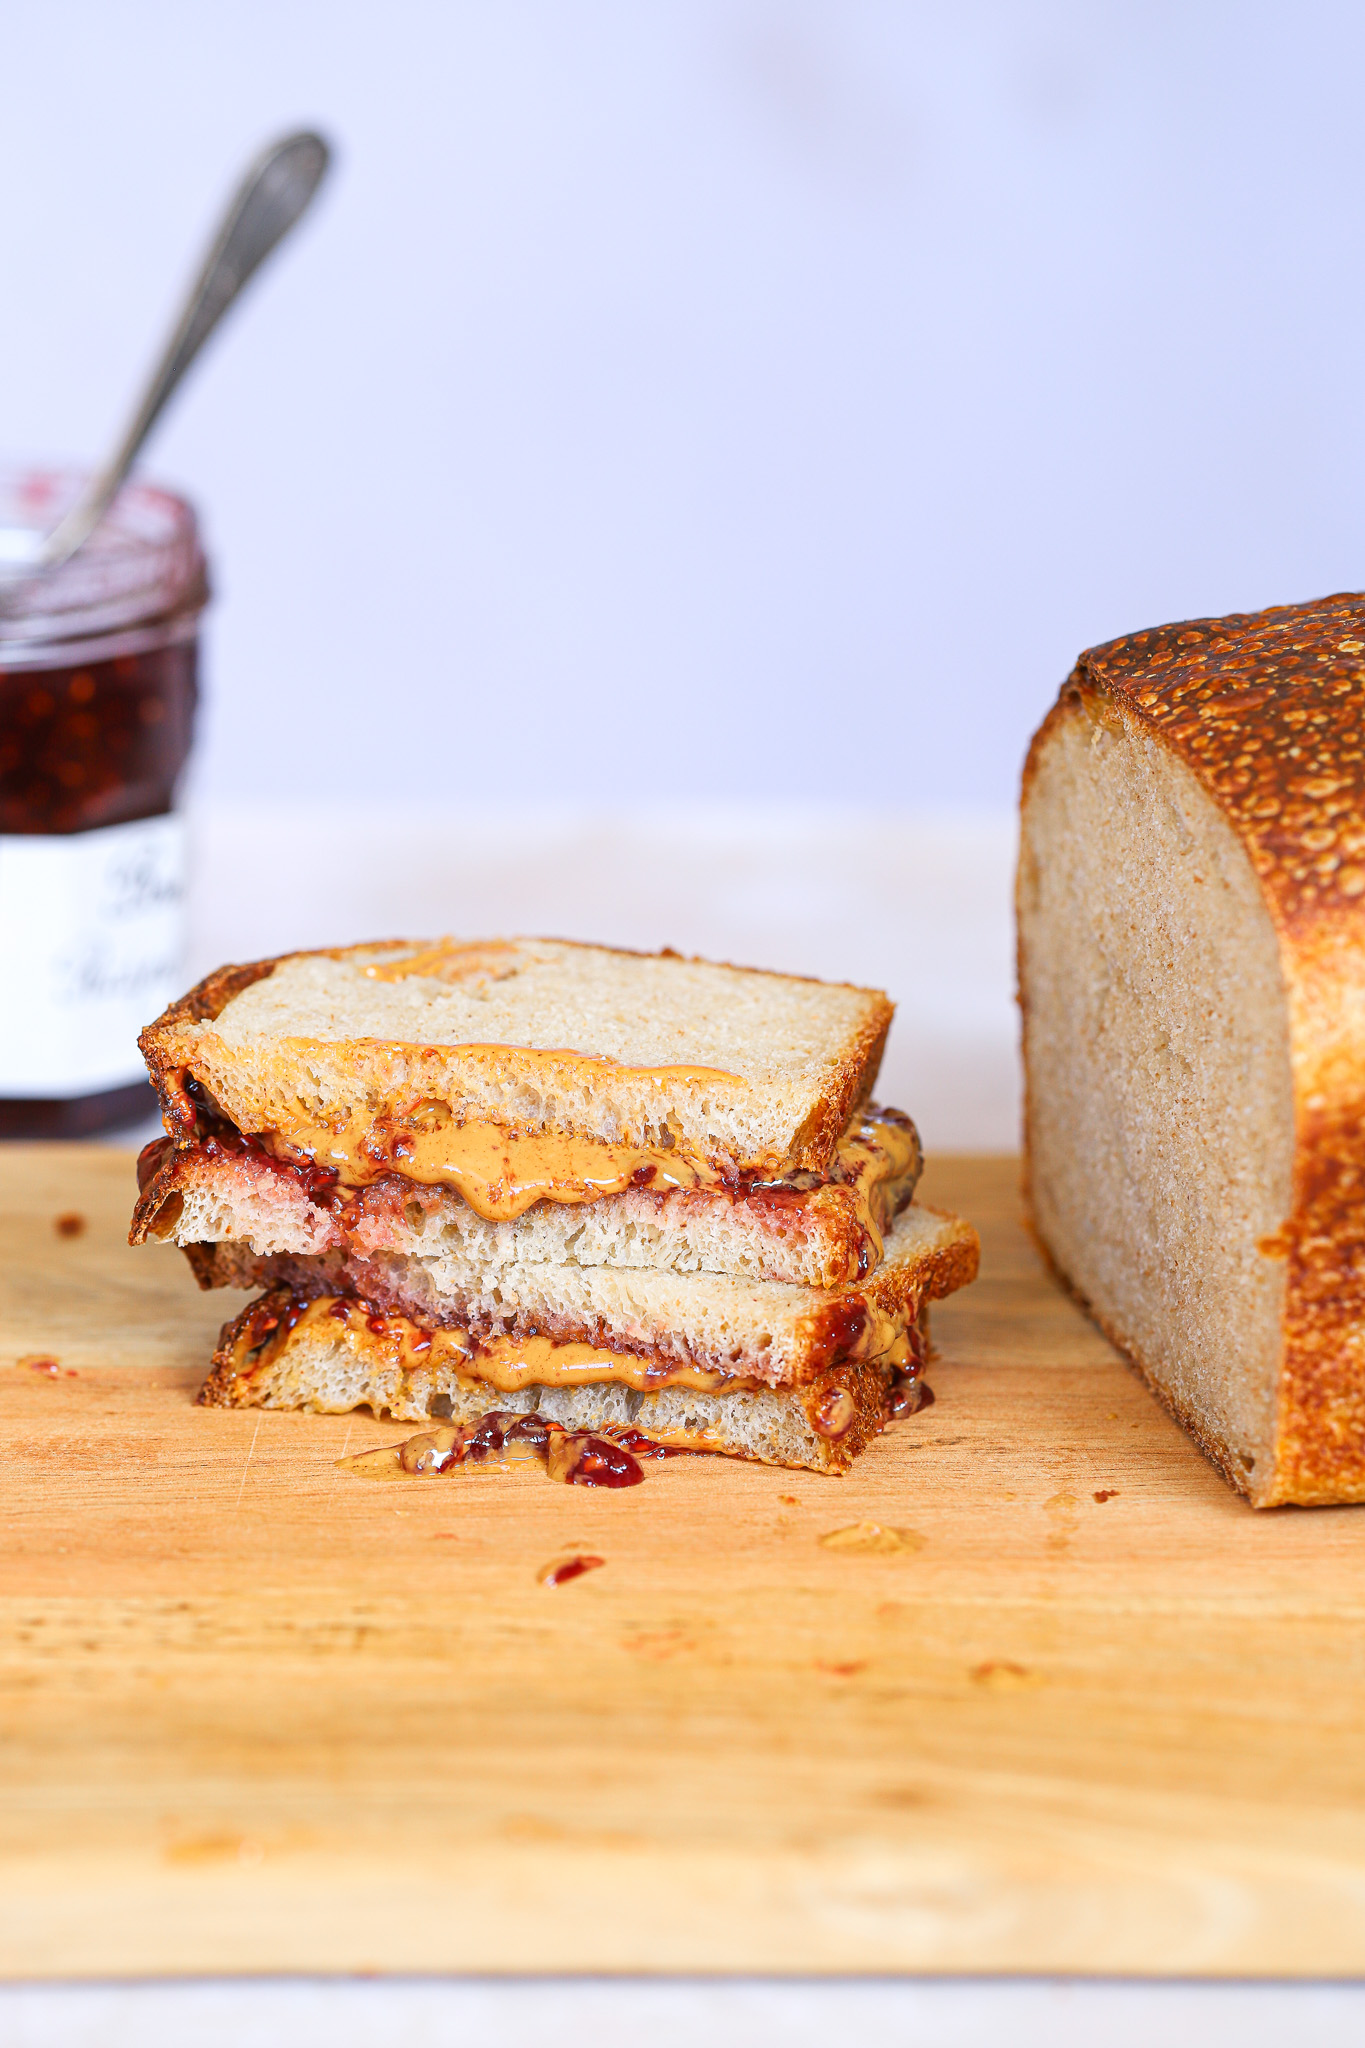
Getting breakfast on the table (and accommodating different requests from everyone) feels like an athletic event; it usually entails a decent amount of screaming, crying, trying to help, and stopping Wren from spilling salt or grabbing knives. Arguably the best part of breakfast time is being greeted by a toasted slice of this fantastic, dependable sourdough sandwich loaf. It’s exceptionally soft, has very few holes for butter or jam to escape through, and a distinct and lovely flavor. It’s also perfect for sandwiches of any kind, and can be sliced thickly or super thin. Basically it can be your friend through breakfast, lunch, and dinner, if you want it to be. It also happens to be very easy to make, no turns every thirty minutes throughout the day—simply stir it up and let your KitchenAid mixer do the rest of the work before letting it rest overnight or for several hours during the day. Then a simple shaping, reshaping, and a final plop into the pans you’ll be baking in. Into the oven once they’re risen and, boom, there’s your bread, ready to bring you joy in the early hours of the day and every hour afterwards.
Notes
I always make two loaves because if you’re going to put in the work, may as well make it worth the effort. We keep one out to eat but, as soon as the other is cool, I slice it thinly, wrap it in beeswax wrap, pop it into a plastic bag, and stick it in the freezer. Whenever we need a slice, I can break it off the loaf in the freezer. This “hack” allows me to bake bread every ten days or even every other week. Obviously this may depend on the size of your family or the voracity of your eaters; by all means, bake more often or make more loaves if you have the pans to bake them in!
This dough is very sticky and quite loose. It will tighten up if you leave it in the fridge overnight, but know that you’ll have to dust your workspace and the dough with a little flour to coax it into the right shape. Work quickly and work the dough with your hands as little as possible to avoid very doughy fingers.

Sourdough Sandwich Loaf
Makes 2 sandwich loaves / adapted from Edd Kimber’s recipe on The Boy Who Bakes
For the sourdough starter:
200g 50/50 flour mix using all-purpose flour* and whole wheat flour
200g cool (not cold) water
850g all-purpose flour or bread flour (in the US, AP flour is often as “strong” as bread flours in other countries; if you want to get technical, you’re looking for about 11-12% gluten)
150g whole-wheat flour
22g fine sea salt
50g mild honey
615g warm (not hot) water
100g mild extra-virgin olive oil
250g ripe sourdough starter
Feed your starter the night before you intend to use it (or at least 6 hours ahead if feeding during the day). Scoop out all but about 1/4–1/2 cup of your old starter. Using a kitchen scale, pour 200g cool water into your container, then add your 200g 50/50 flour. Stir it all together well, making sure to incorporate the bits on the bottom. Put the lid on lightly (it needs air, so never fully close the lid), cover with a kitchen towel, and secure with a rubber band. Leave on the counter overnight. If you live in a warm area, your starter may be ready in about 4-6 hours.
When you’re ready to mix your dough, combine 850g bread flour, 150g whole-wheat flour, and 22g fine sea salt in the bowl of a stand mixer. Stir and set aside.
Pour 50g honey into a medium bowl, then add 615g warm water and stir to dissolve most of the honey. Add 100g olive oil and 250g ripe starter and stir to mostly break up the starter. Pour the wet ingredients into the dry and fold in with a spatula until you have a shaggy dough—I find that my stand mixer often leaves too much flour on the bottom of the bowl if I don’t mix the dough together beforehand, so this is your chance to ensure the flour is evenly distributed. Fit the bowl into your stand mixer and attach the dough hook, then mix on medium-low speed for 10-14 minutes, until the dough is still sticky but is pulling away from the sides and forming a rough ball around the dough hook.
Oil a large bowl or container with olive oil and tip in the dough. Cover with a lid or tea towel and let rest until roughly doubled in size. This can take several hours—my favorite method is to mix the dough in the afternoon, let it rise at room temperature for 2-4 hours to let the yeast get moving, then pop the dough in the fridge overnight.
For the first shaping: When the dough has risen, lightly flour a clean work surface and tip out the dough. Divide it in two as evenly as you can (you can always weigh it if you want to be precise). Dusting with flour as needed, press one of the portions flat, then fold both the left and right “sides” in to meet in the middle, rather like folding a t-shirt. With the seam-side up, roll the dough towards you to make a chunky log. Turn it seam-side down, then pull the dough towards you while also pressing down with your hands—you’re trying to get a nice, tight oblong of dough. Repeat with the other portion of dough, then cover with a damp tea towel and leave to rest for 20 minutes.
Meanwhile, prepare your tins. Rub olive oil evenly inside two loaf pans (I use one ceramic Le Creuset pan and one regular metal tin; use whatever you have), then cut or tear two pieces of parchment paper that will lay across the bottom and two longer sides, pressing those into the pans so it stretches up the sides.
For the second shaping: With the first portion of dough, repeat the same shaping process as before. Dust your hands with a little more flour and quickly plop the rolled dough into one of your lined pans, seam side down. Pat the dough gently with floured hands to get it somewhat evenly dispersed in the pan. Repeat with the other ball of dough, then cover the pans with damp tea towels or clean kitchen “shower caps” and let rise for a couple of hours, or until the dough is nearly level with the top of the tin—you want to err on the side of higher rather than lower. Ideally the dough will be 1/4 inch or less away from the top.
When you’re nearly ready to bake, preheat the oven to 425°F.
Bake the loaves for 15 minutes, then turn the heat down to 415°F and bake for another 25-30 minutes, until the loaves are very browned (but not burnt) on top. Let cool in the pans for about 5-10 minutes, then turn out onto a wire rack to cool completely before slicing into.
Enjoy!

One response to “Sourdough Sandwich Loaf”
[…] Giardinera Ayoh! Sando Sauce**4-6 bread and butter pickles, finely chopped (optional)4 slices of sourdough sandwich bread or your favorite grilled cheese breadabout 1 tbsp pesto, divided2 handfuls of grated mozzarella or […]